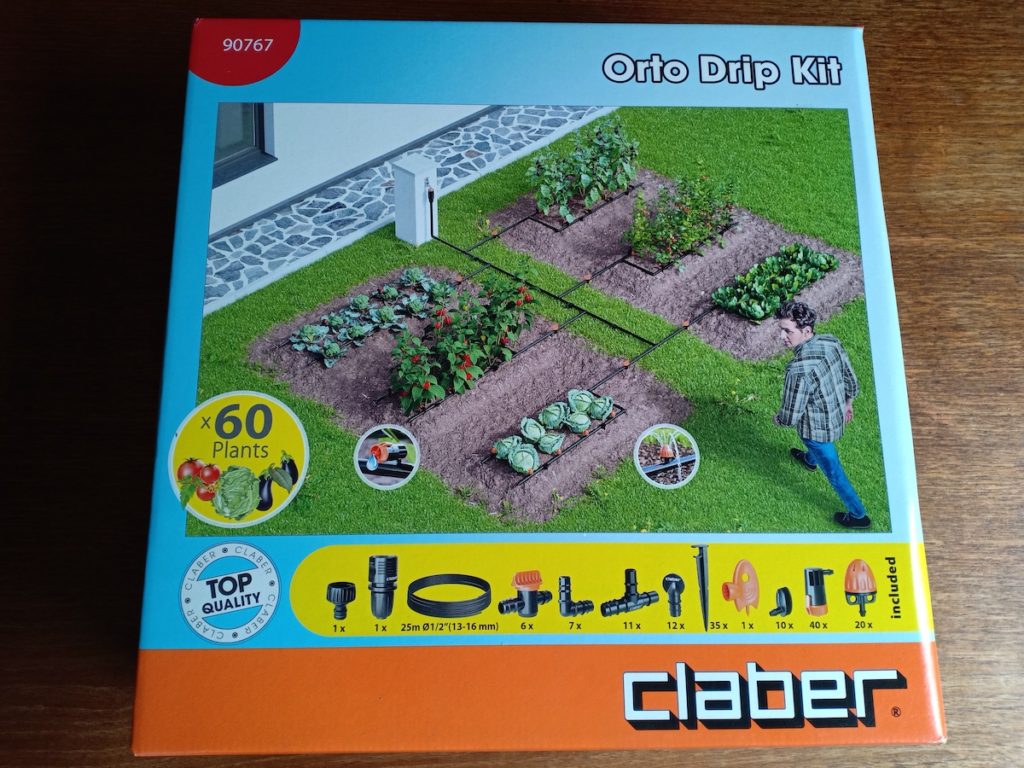
Claber Orto Drip Kit 90767
£70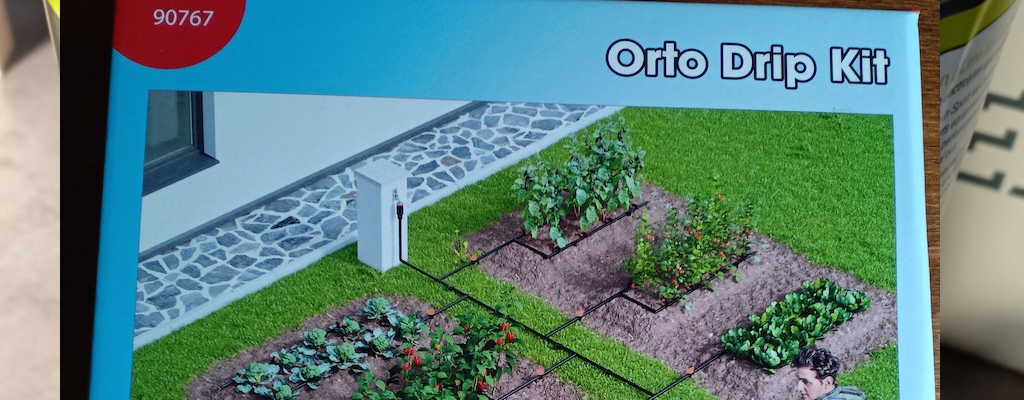
Pros
- Upgradeable
- Strong plastic
- Box full of pieces (no wasted space)
- Delivers water right where needed
Cons
- Rigid pipe inflexible
- Shrubblers fixed position
- Limited instructions
- Tough to attach pieces to pipe
I was really lucky to be given a lovely birthday gift from my work colleagues, a Claber Orto Drip Kit (ref 90767). I’d been thinking of getting an irrigation kit to help keep the salad crops and vegetables watered in my raised bed. Squash need a lot of water, and seeing as I have three raised beds it’s not always easy to find the time to water them all well.
Following some research, I decided to get a Claber irrigation kit. I found one which appeared to be the same kit, but was called by a couple of different names. B&Q knew it as a “Claber Rainjet Planted areas Irrigation kit” whilst Amazon knew it as a “Claber 90767 Allotment Watering Kit“. Claber themselves know it as the Orto Drip Kit, designed to cater for up to 6 vegetable areas.
What’s in the Box?
When the kit arrived, it was reassuring to see that the box was a reasonable size, considering the cost represented quite an investment! The centre of the box was taken up with the main tubing, 25 metres of 1/2″ diameter. I don’t know why Claber are mixing metric and imperial measurements, but that’s how they describe them!
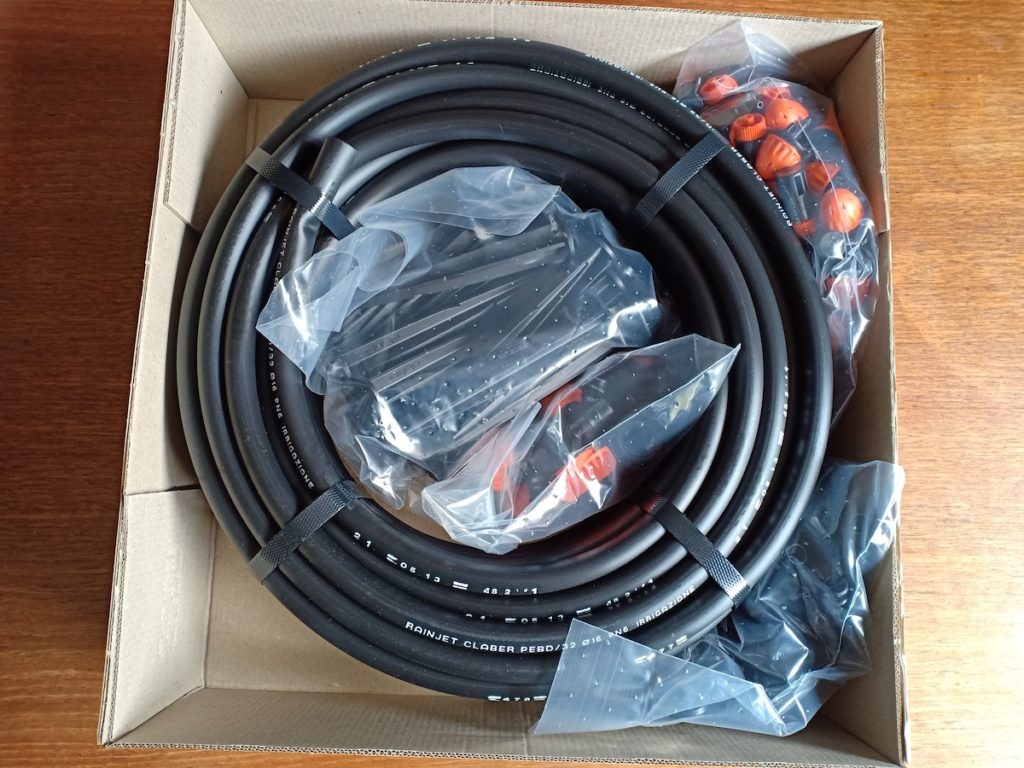
Claber Orto Drip Kit contents is listed as:
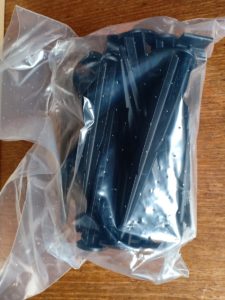
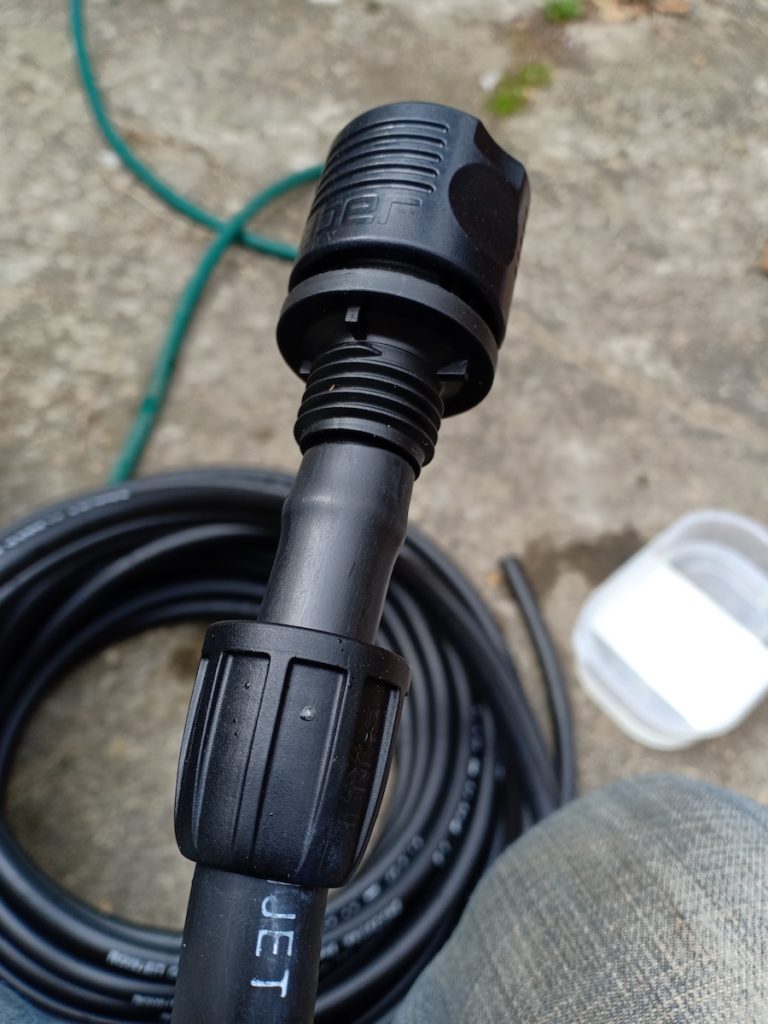
- 1 x 25m Main tube (90365)
- 1 x 3/4” Threaded tap connector (8627)
- 1 x Automatic coupling (91009)
- 6 x 1/2” Shut-off valve (91280)
- 7 x 1/2” Elbow coupling (91081)
- 11 x 1/2” Tee coupling (91071)
- 12 x 1/2” End stopper (91086)
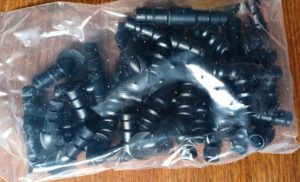
- 35 x 1/2” Support stake (91090)
- 1 x Hole puncher/spanner (91185)
- 1 x Hole plugs (91170)
- 40 x 0-10 l/h Plus end-of-line dripper (91214)
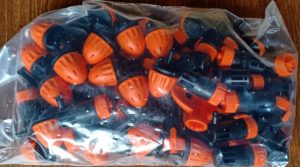
- 20 x Adjustable shrubbler (91232)
Rigid Irrigation Pipe
I was surprised by just how rigid the main pipe is. I’d also purchased some of their smaller irrigation tubing, and it’s much more flexible. I expect the main pipe is built this way to cope with weather conditions, seeing as it could be outside all year around.
But this does present a problem, as the tubing remains very tightly coiled when you unravel it. When you’re trying to lay the pipe from the tap to the vegetable bed, the tubing just wants to coil up again. I’d read that you could leave the pipe out in the sun to help it warm up and make it more supple. That may be fine in Italy, where Claber originates, but in the UK in May it’s not quite that toasty! I’ll cover how I coped with this later on in the review.
Well-made Pieces
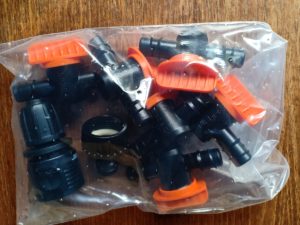
The individual pieces in this kit seem quite robust. Whilst made of plastic, they are quite solid so I expect them to last a reasonable length of time. One noticeable omission though is that this doesn’t come with an instruction manual. The only notification of how to set this kit up comes in the form of a simple visual guide on the box itself. I’d say that’s no ideal, as you can’t tuck the instructions away for future reference in years to come.
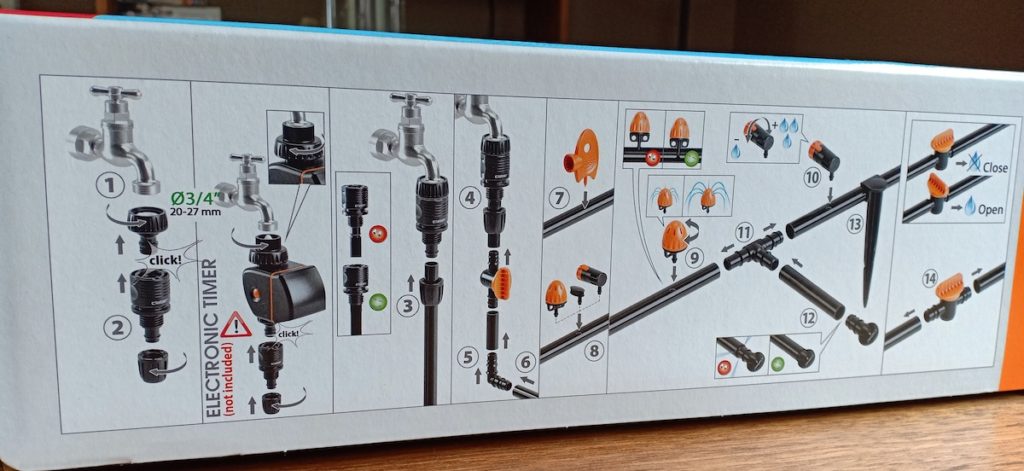
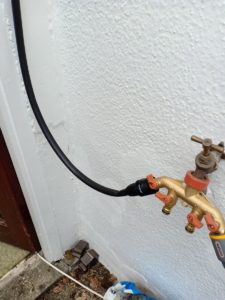
Attaching the Tap Connector
Following the limited instructions, I started to get the kit set up. My raised beds are some distance from the tap, up a terraced area. I needed to support the main pipe up the side of my outbuilding, trailing up the terrace to the raised beds. First thing was to attach the hose connection to the end of the main pipe.
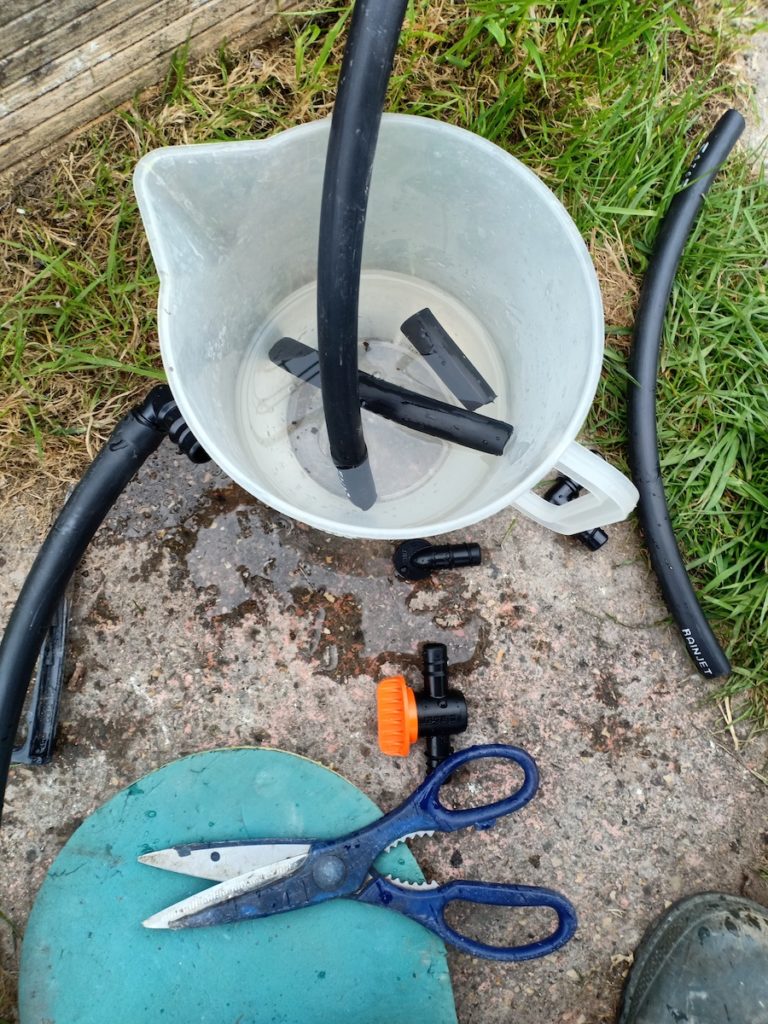
It was so hard trying to get the rigid main pipe onto the 3/4″ threaded tap connector. I decided to try and warm the pipe a little by soaking in some warm water, to make it more flexible. This was the right approach, but I did later decide to use boiling water in a container, which made the pipe a lot more supple. The temperature of this water I initially used wasn’t quite warm enough really.

Once the pipe was a little warmer it was flexible enough to be manipulated onto the tap connector. I then proceeded to run the pipe up my outbuilding. It wasn’t easy, with the pipe wanting to revert back to its coiled form all the time. Of course, most people won’t be doing this though. You’ll probably have a tap near to your vegetable beds (hopefully!).

Cutting the Main Pipe
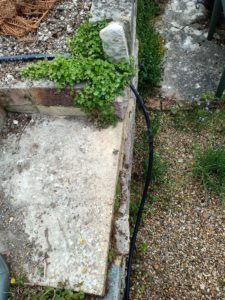
Once I’d worked the irrigation pipe up the terrace to my raised beds, I then needed to cut the pipe. I used scissors and whilst it took quite a bit of pressure, it was possible. I then inserted a t-piece to allow me to run it into one raised bed, as well as running the pipe on to another raised bed. To soften the pipe enough I used a jug with boiling water in it. I brought a flask with extra boiling water in to top it up as I needed to.
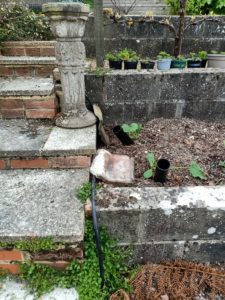
Constructing the Orto Drip Kit
Once the t-piece was in place I could add a small piece of pipe (cut off from the end of the roll of pipe) either side of a shut-off valve. I softened each end of pipe in the hot water, which made it easier to attach. Then at the top I added a right-angle to run the main pipe into the middle of the raised bed. This process was quite straightforward once the pipe was soft, and it was quite satisfying to be making progress now.
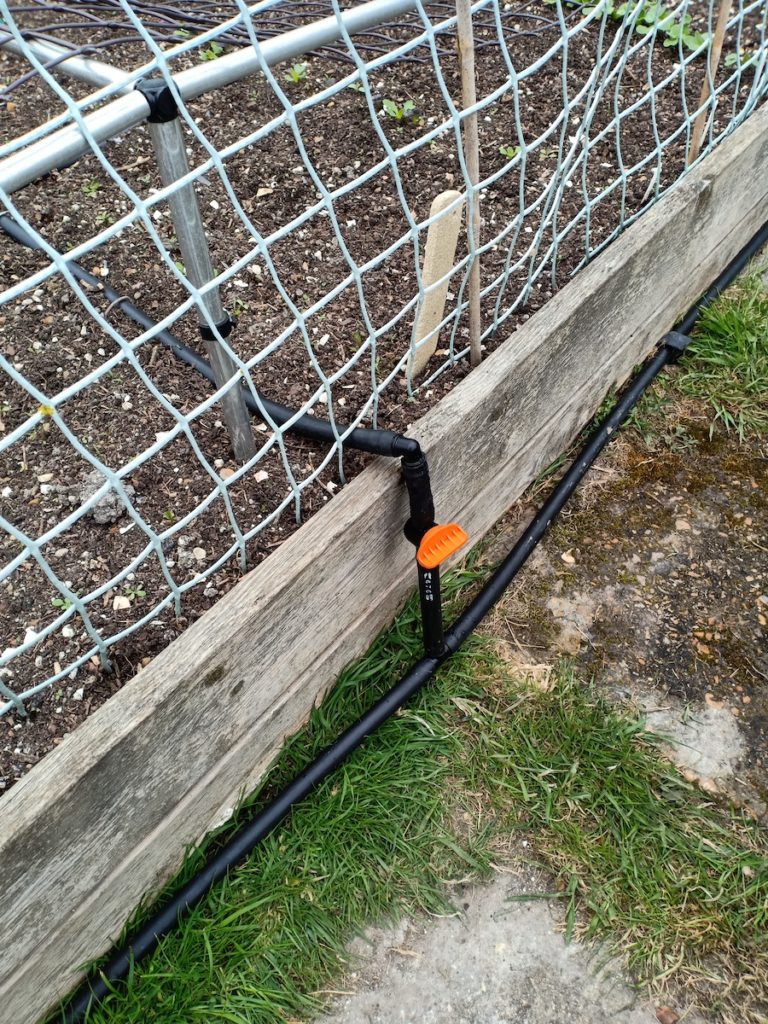
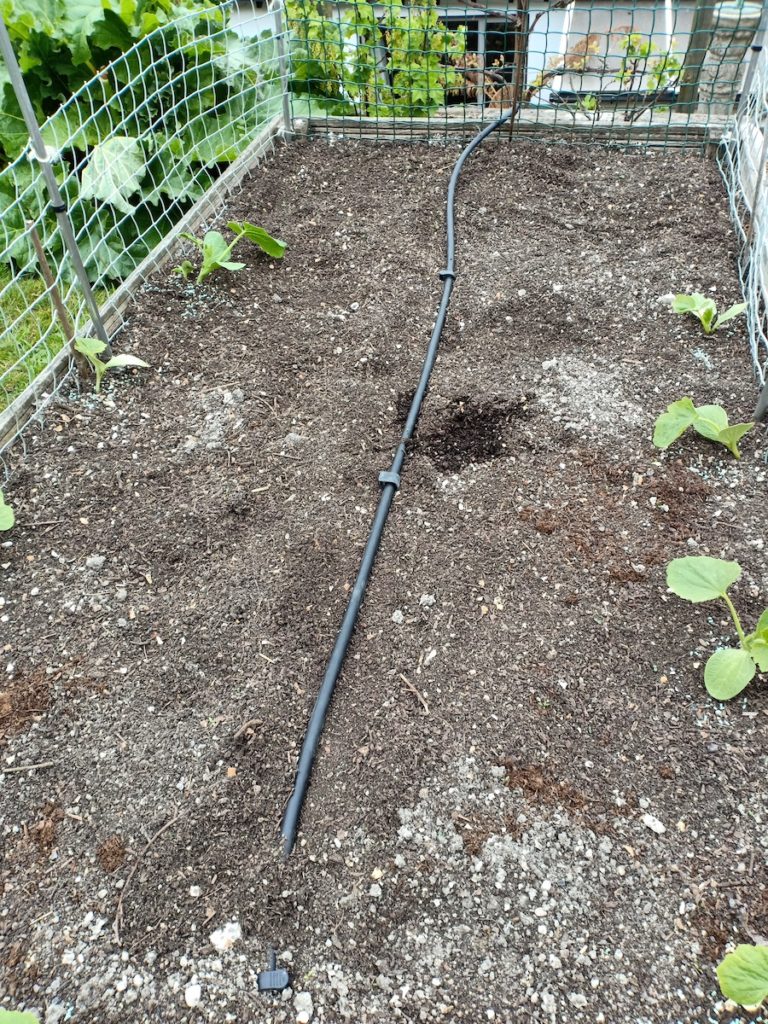
I didn’t have a lot of main pipe to play with, considering I’d needed to use a lot to run it up the terracing. But I was able to supply 3 raised beds with a pipe through the middle of each. I could then use some small-gauge Claber piping I’d bought separately, knowing that I’d need extra pipe for my setup.
Adding Shrubblers and Drippers
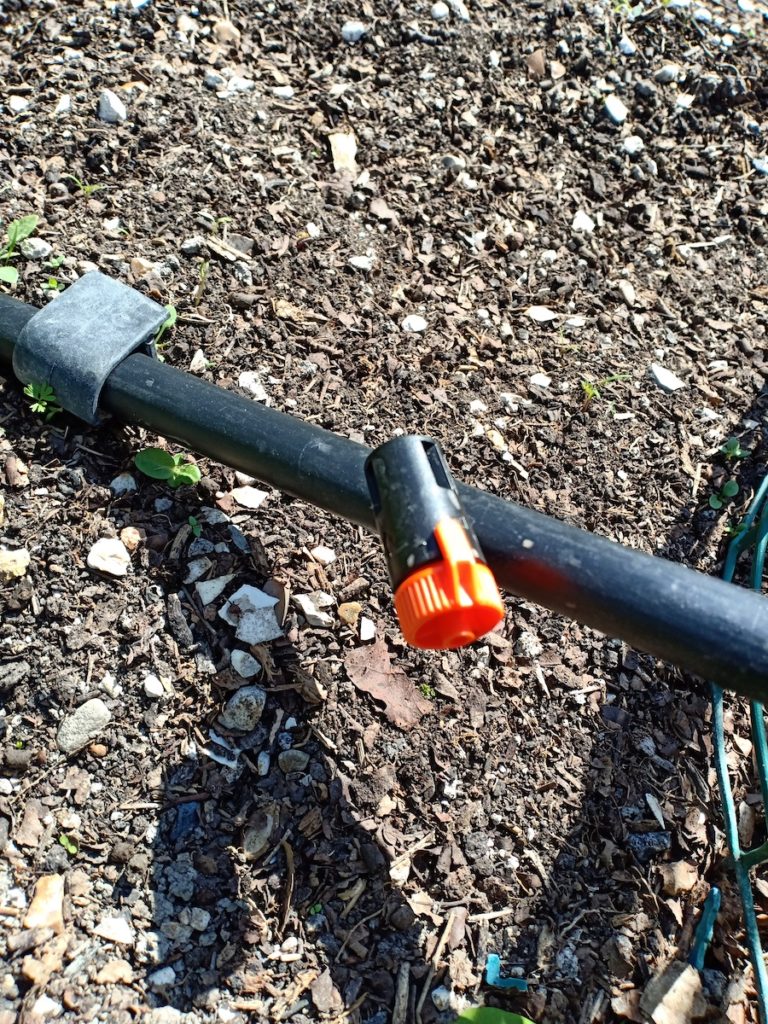
Once all the main piping was in place I was then able to start working on adding the shrubblers and drippers to dispense water. It’s not difficult to piece the main pipe using the special tool that comes with the kit. It is a bit more difficult to attach drippers and shrubblers in that hole though! I turned the air blue on a few occasions trying to push them in whilst supporting the pipe from below to add opposite pressure.
Shrubblers spray out water in all directions (well, 8 I think it is!). You can twist the top of the shrubbier to adjust the strength the water comes out at, and hence the distance the water covers. I have an issue with shrubblers though, as the water just goes in those fixed directions. It would be so much better if they were made to spin and dispense water in all directions. Considering the cost of the kit, I would expect that to be in place.
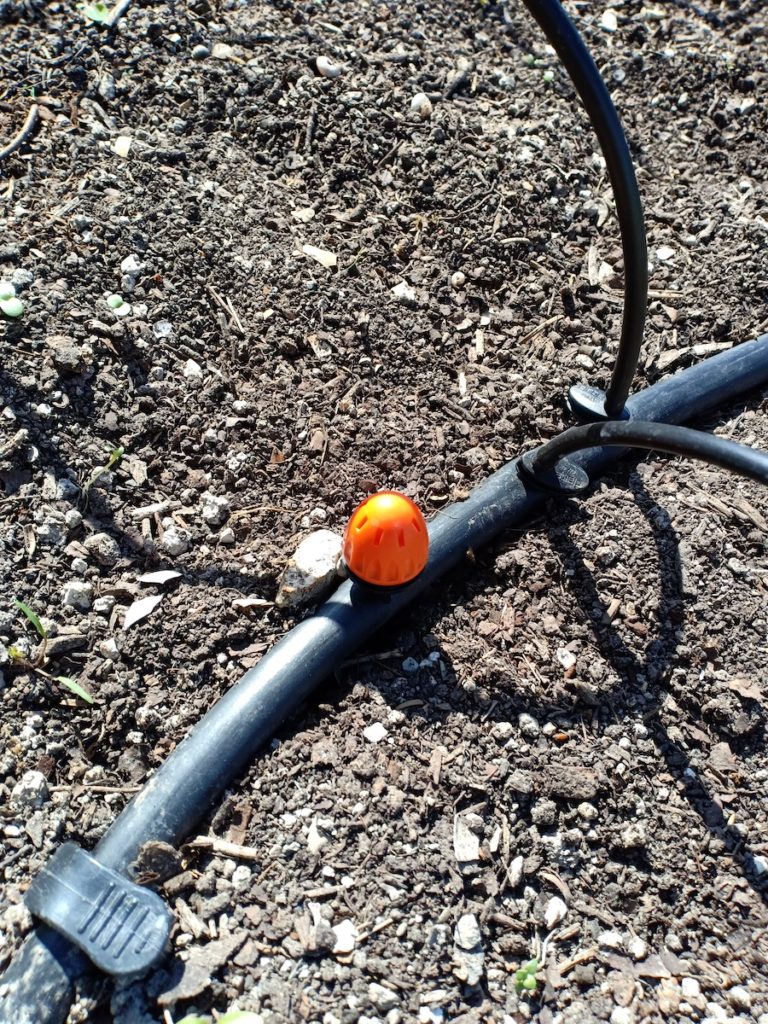
The drippers can also be added into the main pipe, and have an adjustment mechanism on the end that can be twisted to adjust water flow. It goes from a slow drip to a constant flow. These were the most difficult to pop into the main pipe, as it was tricky to find a suitable point on which to push down.
Extra Purchases
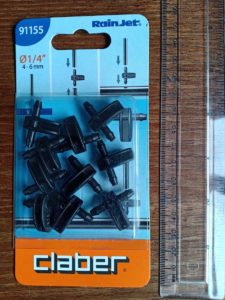
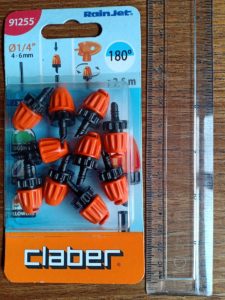
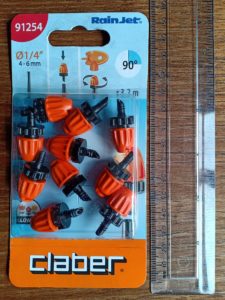
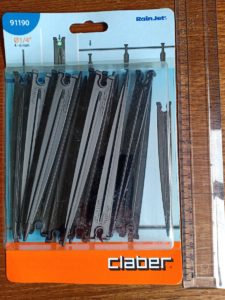
That covers what’s available in this Claber Orto Drip Kit, but I purchased a few extra bits to add to my selection. I needed some 91155 1/4″ connectors to attach the 1/4″ feeder pipe to the main tube. I then added some 91255 1/4″ 180 degree jet sprayers as well as some 91254 1/4″ 90 degree jet sprayers. In addition I purchased some 91190 1/4″ pipe supports to lift the pipe off the ground.
I must say though, that the jet sprayers weren’t a necessary purchase for me, unfortunately. My water pressure just isn’t strong enough to go all the way up the terrace and push lots of water out of lots of jets. It’s fine with the water flow from shrubblers and drippers in one bed if I turn the other two off. But there’s just not enough water pressure for my system to push out of these jets with any force.
Extra Reach for Drippers
But I did find the 1/4″ piping and the connectors useful, as I was then able to direct drippers and dribblers off the main pipe into the furthest reaches of my raised bed. It must be said though, that this isn’t how this system is intended to be used. It’s intended for people who’s water supply is nearer to the vegetable beds. This means the main pipe can be run off in several directions, alongside vegetables which can then have a dripper added right by them.
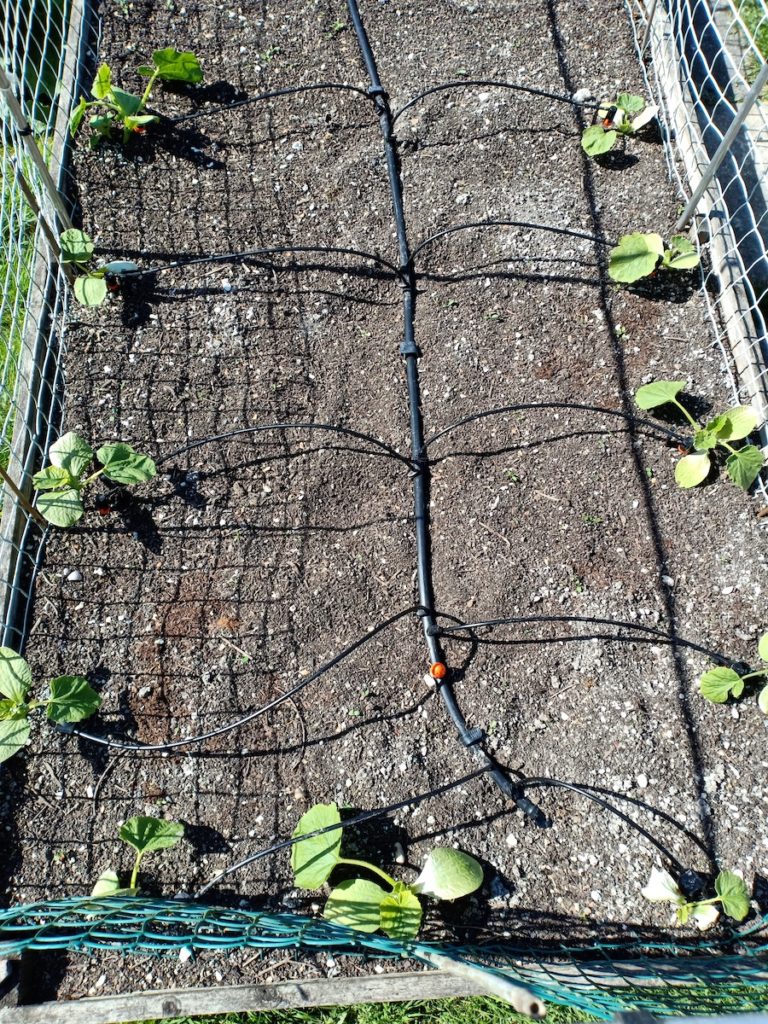
My setup was a bespoke one to cope with my site. In hindsight, what I should have done is bought more main pipe and used all the connections that came with the Orto Drip Kit. I could then have used the drippers as intended, inserted directly into the main 1/2″ pipe, right by the vegetable to be watered. Perhaps I’ll look to do that next year, when I get the kit out of storage again and rebuild it around my vegetable planting pattern.
Claber Orto Drip Kit Summary
This is quite an expensive purchase, but there is a lot of kit packed into the box. I can see it being a good addition for a lot of people who want to make their vegetable watering a little bit easier or more regular. You’ll be able to drip water in to the base of your veg to reduce water loss and make sure it gets right to where it’s needed.
It’s not the easiest to get to grips with to start off, and the instructions are a little lacking. But if you take my advice of making sure you have some hot water with you to soften the ends of the tube, you’ll be able to attach junctions and taps so much easier. If you’re in a warmer country than the UK you may also find you’re able to straighten the main irrigation pipe out if you lay it out and weight it down on a warm sunny day. But I wasn’t able to do that here in the cool UK.
You could always couple it with an automated timer, which will enable you to set up regular watering – ideal if you’re going away during a hot spell. That doesn’t come with this kit though, so you’d have to buy that separately.
The pieces are all well made and sturdy, so you should find them lasting many seasons, making the high purchase price a little more bearable. If you lay the kit out like the design shown on the box, it’s probably the most worthwhile layout. If you do need to extend, I’d suggest getting more of the 1/2″ pipe and connectors, rather than doing as I did and getting 1/4″ pipe.
Guy Goes Green
If you found this review useful, you may like to subscribe to my YouTube Channel, Guy Goes Green.
Like most people, I’m not perfect, so I’m going to try and change my life to make less of an impact on the earth. One small step at a time. Join me as I look at ways I can reduce my impact. What works? What doesn’t? I’ll share my experience, to help you make informed choices for yourself. Subscribe now, and come join me on the journey!
Watch now at Guy Goes Green.