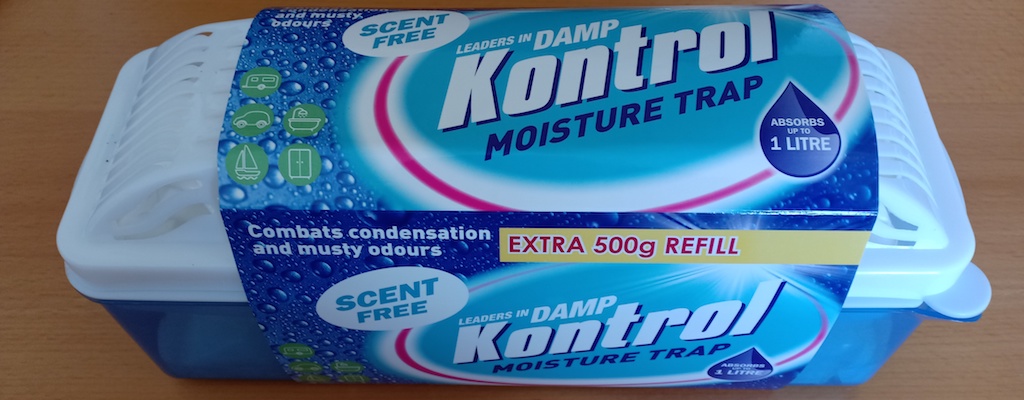
Kontrol Moisture Absorber Trap (Pack of 2)
9.24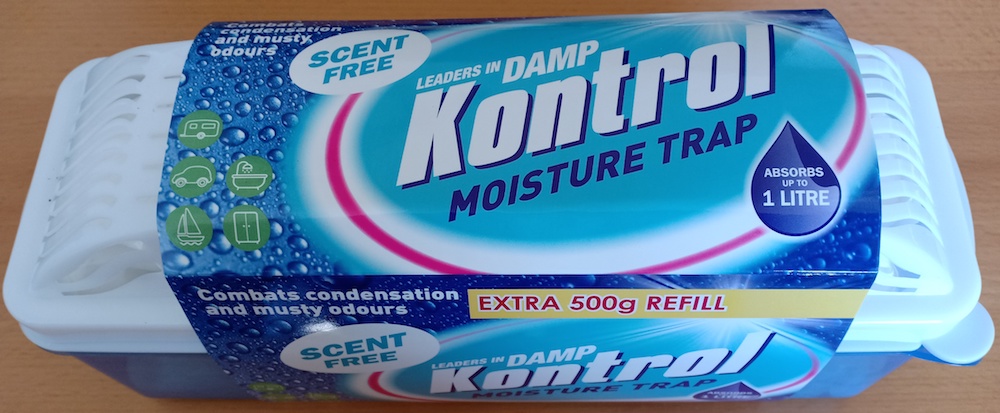
Pros
- Light
- Easy to clean
- Discrete
Cons
- Plastic could break under heavy hands
I was looking for a different type of moisture trap and settled on the Kontrol Moisture Absorber Trap. I have moisture traps in three of my cupboards that are on external walls, which are susceptible to damp. For one cupboard I’ve used a UniBond Aero 360 Moisture Absorber for a while now, as it was a gift. Because the other moisture absorbers are the type that use granules, I was keen to standardise them all and save the need to buy different absorbers. I located a Kontrol Streamline Moisture Absorber Twin Pack at Amazon.
What’s in the Pack?
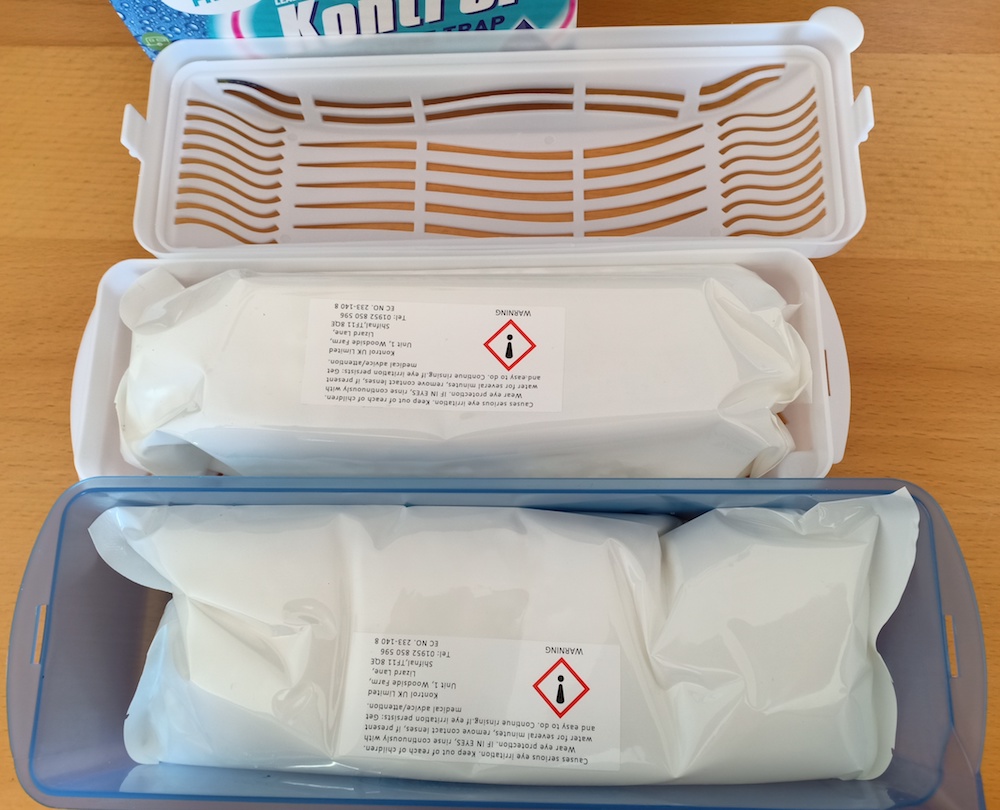
The set came well packaged, with each trap coming with a bag of moisture absorbing crystals nestled inside. The trap itself consists of:
- Blue plastic container, which acts as a reservoir for collected liquid formed as the crystals react with moisture in the air.
- White plastic tray which suspends inside the blue container and holds the moisture absorbing crystals.
- White plastic top, vented to allow air to circulate, and with a tab to cover the drain from the blue container.
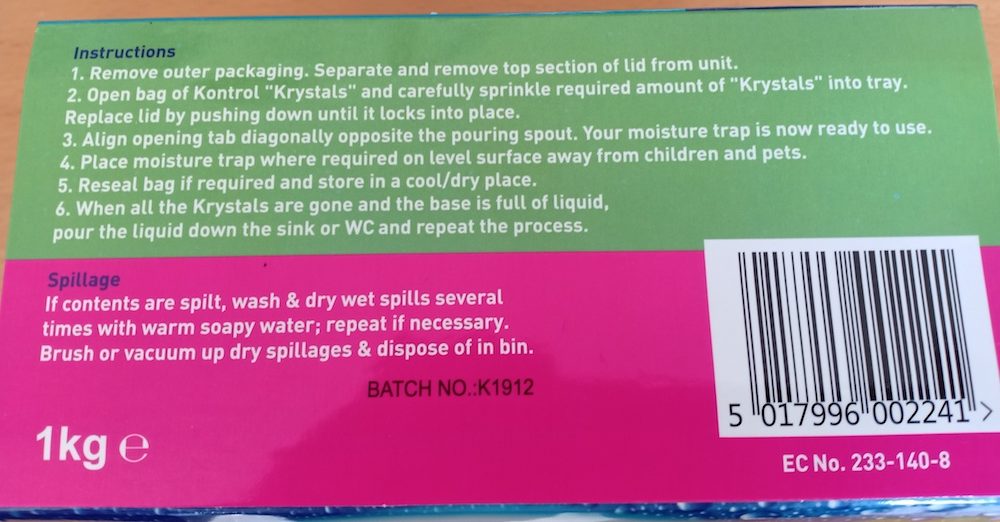
Clear Instructions
The cardboard outer which was sleeved around the moisture trap contains instructions for use, as well as how to deal with spillages. For spillages it says: “If contents are spilt, wash and dry wet spills several times with warm soapy water; repeat if necessary. Brush or vacuum up dry spillages and dispose of in bin”.
I always try to be careful when emptying the liquid out of traps like this, so I pour it carefully down my sink and wash it away with some tap water. I then use some kitchen roll to wipe the drip forming on the container, to save it dripping in the cupboard.
Setting up the Kontrol Moisture Absorber
So let’s work through those instructions to set it up.
1. Remove outer packaging. Separate and remove top section of lid from unit.
Yep, you saw that above. Make sure the tray to hold the crystals is sitting within the blue container.
2. Open bag of Kontrol “Krystals” and carefully sprinkle required amount of “Krystals” into tray. Replace lid by pushing down until it locks into place.
Don’t be too heavy handed when opening the bag containing the crystals. Just snip off the corner of the bag to empty the crystals into the tray.
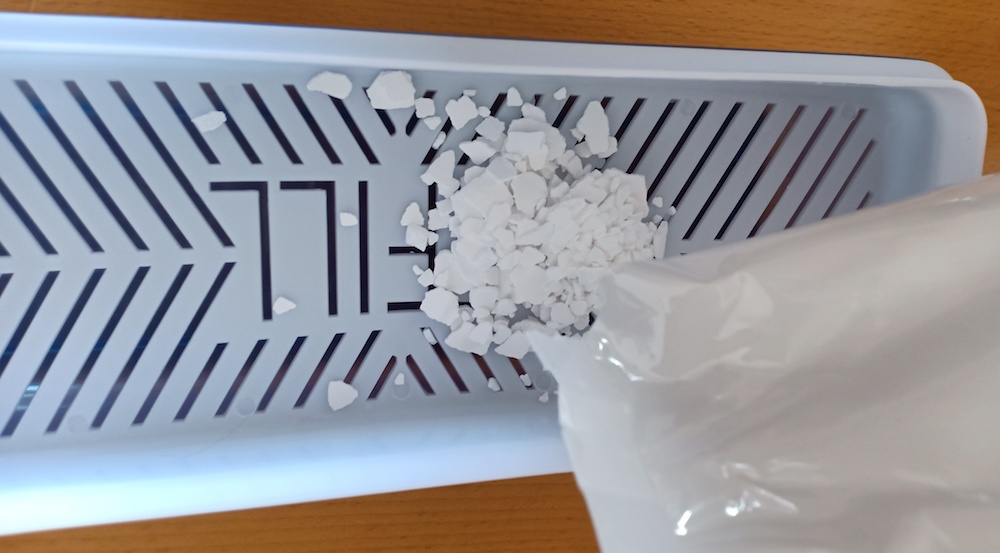
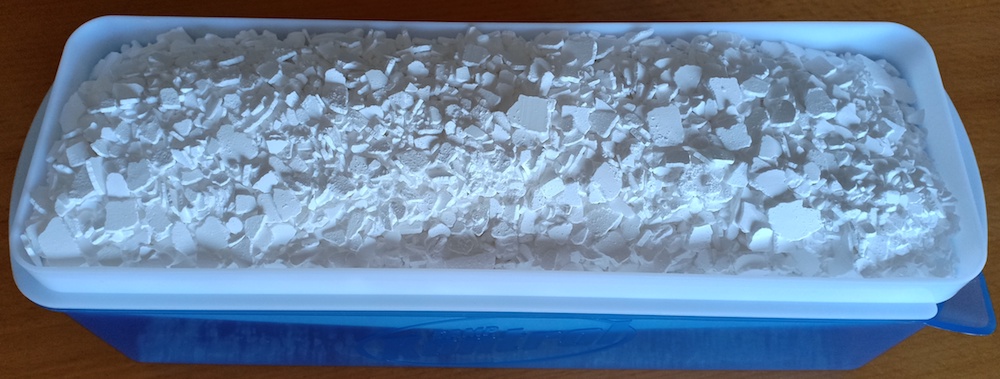
Make sure you don’t overfill with crystals. Just make sure that there’s a layer across the entire surface, and that the lid will easily fit on.
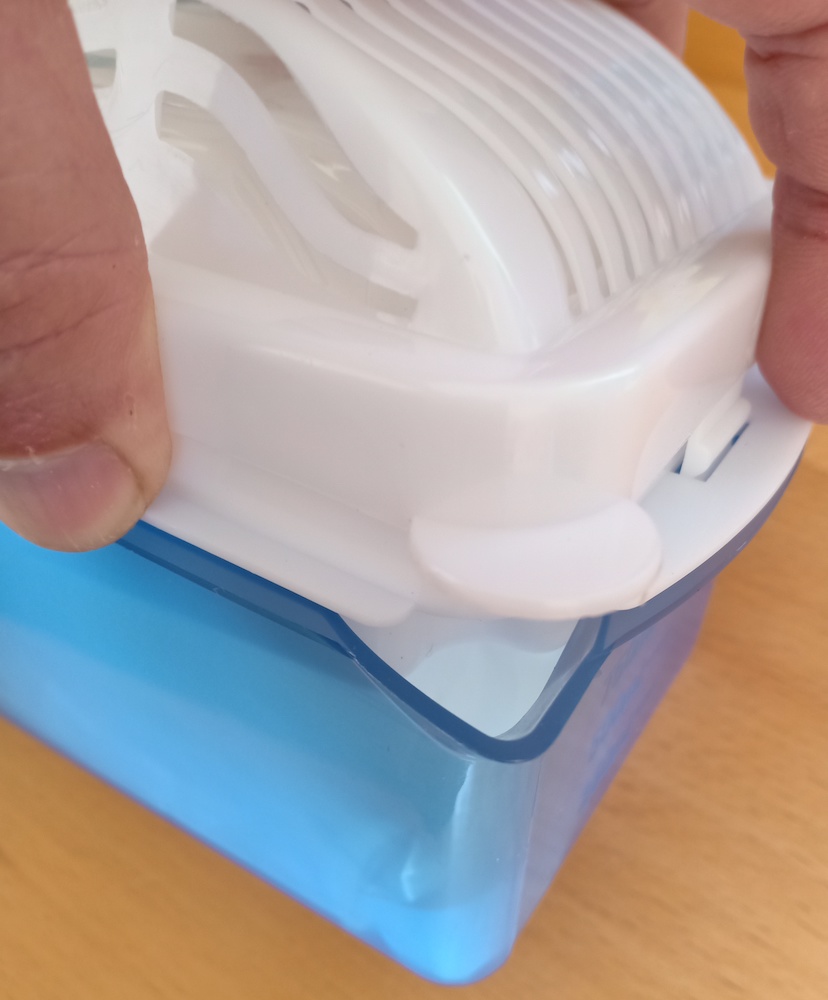
3. Align opening tab diagonally opposite pouring spout. Your moisture trap is now ready to use.
Careful Now!
I made a mistake with mine below, putting the opening tab above the pouring spout! So, make sure it’s diagonally opposite. You can open it either way, but if you have it opposite it leaves the pouring spout free to pour at any time. You don’t then need to take the top off to pour.
4. Place moisture trap where required on level surface away from children and pets.
Mine is tucked behind pots and pans in a kitchen cupboard. You don’t need to see that! Just make sure that it’s somewhere that has air flow above, and is accessible to remove and empty when needed.
5. Reseal bag if required and store in a cool/dry place.
As with all dangerous chemicals in the house, store it in a place inaccessible to children. Ideally keep it in a sealed container for safety and to keep it dry.
6. When all the Krystals are gone and the base is full of liquid, pour the liquid down the sink or WC and repeat the process.
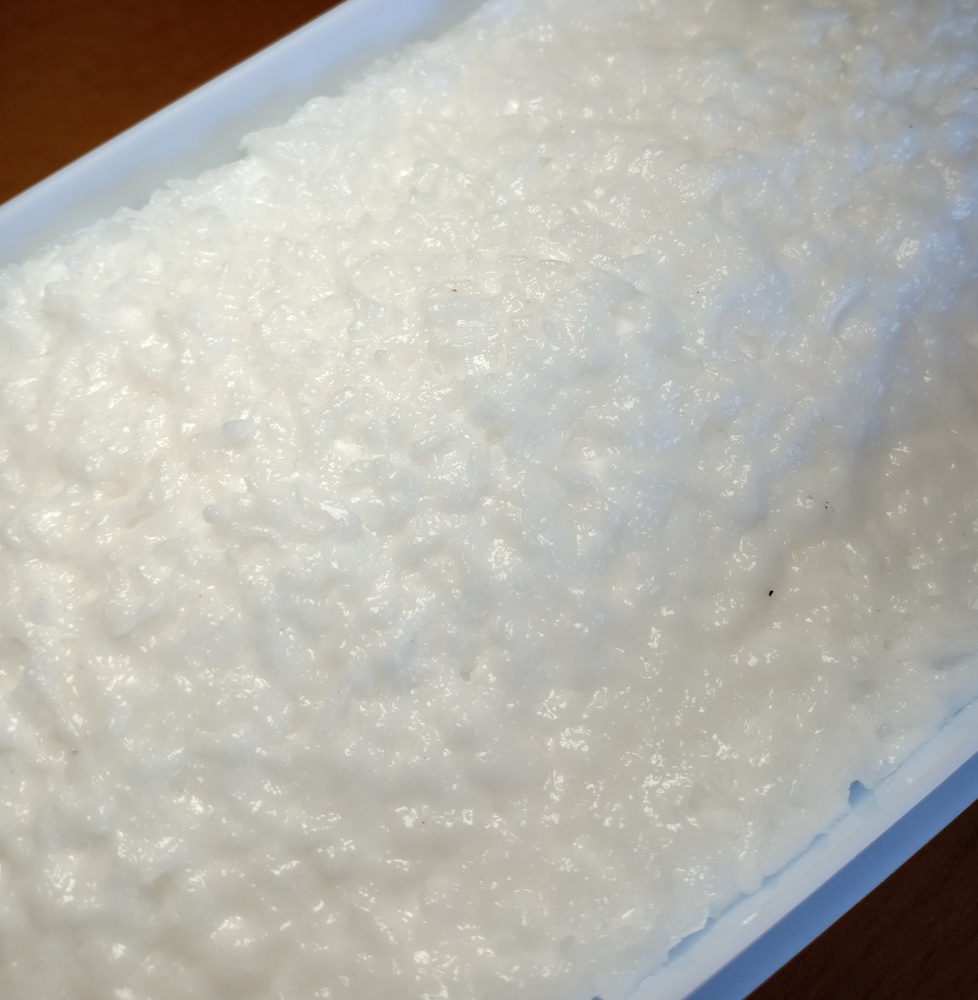
Over time the crystals react with moisture in the air. You can see the crystals start to get moist in the photo below. It drips into blue container over time, with the crystals slowly being used up and disappearing.
Summary
The Kontrol Streamline Moisture Absorber Trap is easy to set up and use. It’s very light and at 24cmx11cmx8cm is big enough to hold a good quantity of crystals. The speed it works will depend on the relative moisture of where it’s located. But clearly, the more crystal available the more liquid will be removed over time.
I have found its height to be small enough to be discrete at the back of the cupboard, if that’s a concern for you. The pack comes with 2 x 500g packets of moisture absorbing crystals, which is more than enough for both of the moisture traps. You will need to keep replenishing the crystals when they get used up, which takes a number of weeks depending on the moisture in the area you’re controlling. The replacement crystals are reasonably priced, with this multipack of 3 x 2.5kg Kontrol Moisture Absorber Crystals (so total 7.5kg) being great value.
As long as you’re careful when handling and emptying the Kontrol Moisture Absorber Trap, it shouldn’t be messy. I can thoroughly recommend these moisture traps and crystals, as they certainly do the job for me. I did have a problem with mould in the cupboards, but as long as I keep the crystals topped up the problem is controlled.
If you have a damp problem indoors, you may wish to read my review of the Meaco 20L LE Low Energy Dehumidifier…